We may earn commission from links on this page at no extra cost to you. We only recommend products we back!
How to clean a short ram intake filter: Remove the filter, blow out debris with compressed air, wash with a cleaning solution, let it dry, and reapply oil if necessary before reinstalling.
A clean short ram intake filter plays a vital role in optimizing your engine’s performance. By ensuring that your air intake system is clear of debris and contaminants, you help your car run efficiently, boosting horsepower and fuel economy. In this detailed guide, we’ll walk you through the complete process of cleaning your short ram intake filter, from gathering the necessary materials to reinstalling the cleaned filter. Whether you’re a seasoned car enthusiast or just starting to work on your vehicle, this guide will help you maintain your intake system in top condition.
Why Cleaning a Short Ram Intake Filter is Important
A short ram intake (SRI) system typically shortens the intake path, allowing for quicker airflow and increased engine responsiveness. This boost in performance is great, but it also means that the air filter is more exposed to dirt, debris, and contaminants from the environment.
When these contaminants accumulate in the intake filter, airflow becomes restricted. This can lead to several problems, such as:
- Decreased engine performance: A clogged filter prevents enough air from entering the engine, reducing horsepower and responsiveness.
- Lower fuel efficiency: If the engine isn’t getting the right amount of air, it will use more fuel to achieve the same power.
- Potential engine damage: Long-term neglect can lead to poor air-to-fuel ratios, which may damage sensitive engine components like the MAF (Mass Air Flow) sensor.
Regular cleaning of your short ram intake filter is essential to avoid these issues and maintain the performance enhancements the intake system provides.
Step-by-Step Guide to Cleaning Short Ram Intake Filter
Cleaning a short ram intake filter is a relatively simple process, but it requires attention to detail. Let’s break down the steps for you:
Step 1: Gather Your Tools and Materials
Before you begin, it’s important to have the proper tools on hand. Here’s a list of what you’ll need:
- Air filter cleaner: A cleaner designed specifically for air filters (usually available in aerosol form).
- Replacement filter oil (if applicable): After cleaning, some filters, such as oiled cotton gauze filters, require re-oiling.
- Soft-bristled brush: A brush with soft bristles will help you clean delicate parts of the filter without damaging it.
- Compressed air or air blower: Used to remove excess dirt before washing the filter.
- Water: A hose or bucket to wash the filter.
- Rubber gloves: Protect your hands from dirt and cleaning solutions.
Make sure you have everything ready to avoid stopping mid-way through the cleaning process.
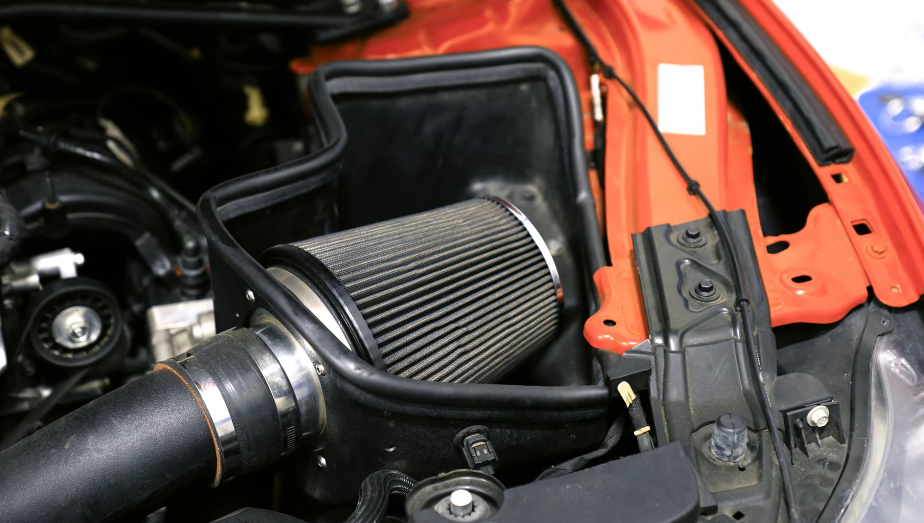
Step 2: Remove the Filter from the Intake System
The first step is to remove the filter from the vehicle. Depending on the type of short ram intake system you have, this may involve unscrewing bolts or loosening clamps to detach the filter from the intake tubing. This process should be done carefully to avoid damaging the intake system or the filter itself.
Take note of how the filter is positioned within the intake, as you’ll want to reinstall it in the same orientation later. You may also want to check for any obvious damage or signs of wear on the filter during removal.
Step 3: Clean the Filter with Compressed Air
Once the filter is removed, use compressed air or an air blower to dislodge loose dirt and debris from the surface of the filter. Hold the filter upside down and blow air through it from the clean side (the side that faces the intake). Be sure to do this gently, as using too much force may damage the filter material.
Blow air through the filter pleats to make sure dirt is removed from all areas. You can also tap the filter lightly to help shake off any dirt that’s stuck in the fibers. If you notice any particularly stubborn dirt, you can use a soft-bristled brush to gently loosen it.
Step 4: Wash the Filter with Cleaning Solution
Next, it’s time to wash the filter. Fill a bucket or basin with warm water and mix it with an air filter cleaning solution. These solutions are designed to break down dirt without damaging the filter material. If you don’t have a specific filter cleaner, mild dish soap can work in a pinch.
Submerge the filter into the water and let it soak for a few minutes to loosen the dirt. Then, using a soft-bristled brush, gently scrub the surface of the filter. Work the brush in a circular motion, being careful not to damage the filter’s pleated structure. Be sure to clean both sides of the filter, as dirt and debris can accumulate on both surfaces.
If the filter is heavily soiled, repeat this process until the water runs clear and the filter is free of dirt. Avoid using harsh chemicals, as they can weaken the filter’s material and affect its performance.
Step 5: Dry the Filter Thoroughly
Once the filter is clean, the next step is drying it. Do not reinstall the filter until it is completely dry. Wet filters can cause damage to the engine or intake system when reinstalled.
To dry the filter, gently shake off any excess water and then allow it to air dry in a well-ventilated area. Ideally, let it dry naturally for several hours, avoiding the use of direct heat sources such as hairdryers or heaters, as these can distort or damage the filter material. Ensure that the filter is thoroughly dry before proceeding to the next step.
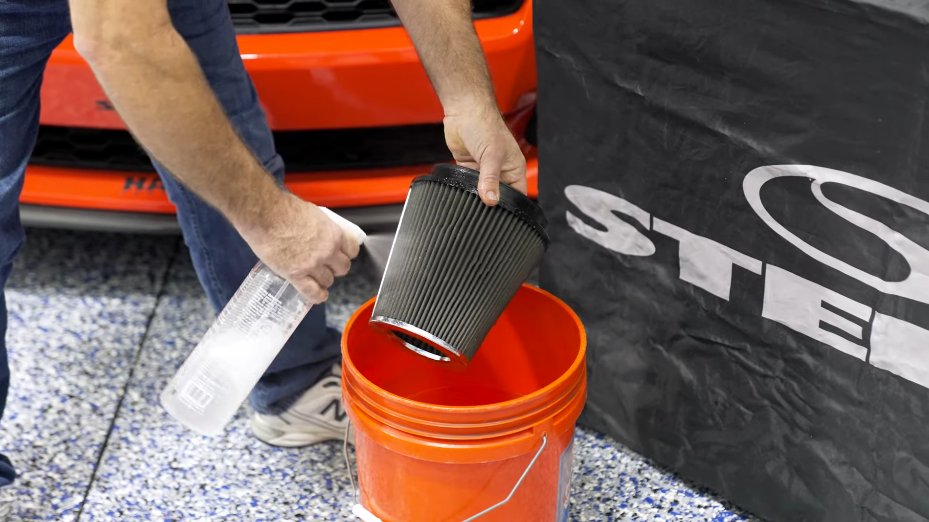
Step 6: Reapply Oil (If Necessary)
If your filter is an oiled cotton gauze filter (such as those from K&N), you will need to reapply filter oil after cleaning. This oil helps capture dirt and prevent it from entering the engine.
To apply the oil:
- Hold the filter and spray the oil evenly across the filter’s surface, focusing on the pleats.
- Allow the oil to soak into the filter for a few minutes.
- Wipe off any excess oil with a clean cloth to prevent over-oiling, which can lead to excess oil being drawn into the intake and contaminating the MAF sensor.
If your filter is not an oiled filter, skip this step and move on to the next.
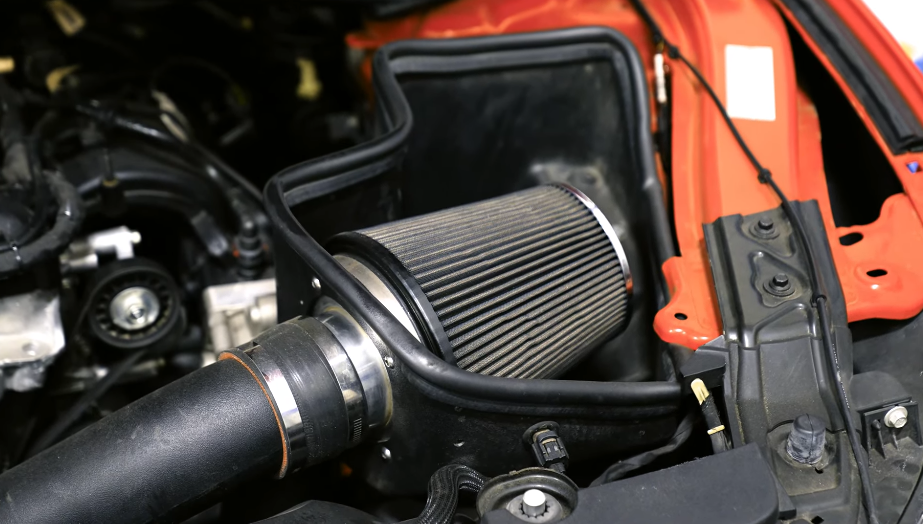
Step 7: Reinstall the Filter
Now that your filter is clean and dry, it’s time to reinstall it into the intake system. Place the filter back into the intake tube, ensuring it is securely fastened. Tighten any clamps or bolts you removed earlier to prevent air leaks that could reduce engine performance.
Make sure the filter is seated properly, as improper installation can lead to issues with airflow or even engine damage.
How Often Should You Clean Short Ram Intake Filter?
The frequency of cleaning your short ram intake filter depends on several factors, including your driving conditions and the type of filter you use. In general, it’s recommended to clean your short ram intake filter every 10,000 to 15,000 miles. However, if you drive in dusty or off-road conditions, you may need to clean the filter more often.
If you live in an area with frequent rain, mud, or pollution, it’s also a good idea to check the filter regularly for signs of clogging or dirt buildup. Some drivers may opt to clean their filters more frequently as a preventative measure.
What Happens if You Don’t Clean the Filter Regularly?
Neglecting to clean your short ram intake filter can lead to several performance issues:
- Restricted airflow: A clogged filter prevents the engine from getting the air it needs, reducing engine performance.
- Decreased horsepower and acceleration: With less air reaching the engine, it may struggle to produce the same level of power.
- Poor fuel efficiency: As the engine compensates for the reduced airflow, it may use more fuel to maintain the same performance.
- Potential engine damage: Over time, the buildup of dirt can lead to poor air-to-fuel ratios, which may cause engine components to wear out prematurely.
Cleaning the filter regularly ensures optimal performance and extends the life of your engine.
Tips for Prolonging the Life of the Short Ram Intake Filter
To ensure your short ram intake filter lasts longer and continues to perform optimally, regular maintenance is essential. Here are some tips to help you keep your filter in top shape for years to come.
- Avoid over-oiling: If your filter requires oiling, make sure you don’t apply too much. Over-oiling can cause excess oil to enter the intake system and damage the MAF sensor.
- Check for damage: Regularly inspect the filter for signs of wear, such as tears, holes, or excessive dirt buildup. If the filter is damaged, replace it immediately.
- Use a pre-filter: Consider adding a pre-filter cover to protect the intake filter from larger debris and dirt. This is especially useful for off-road vehicles.
- Clean the intake system: While cleaning the filter, take the opportunity to check the intake tubing for cracks or debris buildup. Keeping the entire intake system clean will ensure maximum airflow and performance.
Frequently Asked Questions
Here are some FAQs about cleaning short ram intake filter –
1. How often should I clean my short ram intake filter?
It’s recommended to clean the filter every 10,000 to 15,000 miles, or more frequently in dusty or harsh driving conditions.
2. Can I use regular soap to clean the filter?
While mild soap can work in a pinch, it’s best to use a cleaning solution designed for air filters to ensure it doesn’t damage the filter material.
3. What happens if I over-oil my air filter?
Over-oiling your filter can cause excess oil to be drawn into the intake system, which may damage the MAF sensor and affect engine performance.
4. How can I tell if my filter needs to be replaced?
If your filter is damaged (torn or heavily worn), it should be replaced. A clogged filter will also reduce airflow, affecting engine performance.
5. Can I clean my filter without removing it from the vehicle?
While it’s possible to clean the filter without removing it, we recommend removing it for a more thorough cleaning and to inspect it for damage.
Conclusion
A clean short ram intake filter is essential for maintaining optimal engine performance. Regular cleaning ensures that your vehicle continues to perform at its best, delivering the horsepower and fuel efficiency you need. By following this comprehensive guide, you’ll keep your intake system in top condition, enhancing the longevity of your engine and preventing potential issues caused by a clogged filter.
Remember, a little maintenance goes a long way in preserving the health of your engine. By cleaning your short ram intake filter regularly, you’ll help your car run smoothly and enjoy the full benefits of your intake system.
Amazon and the Amazon logo are trademarks of Amazon.com, Inc, or its affiliates.
Leave a Reply